
This is a step by step guide on how to password protect an Excel file. Apart from setting password for the whole workbook, we will also walk through how to restrict access (with or without password) for specific worksheets and even specific cells. First it is important to distinguish the difference. With setting a password on the entire workbook, no one will be able to open the file again unless a password is entered. No one will even be able to see the content. With Protect Sheet, content can still be viewed but user will not be able to make any changes to the data unless the worksheet is unprotected again.
Password Protect the Entire Excel File
It sounds obvious but remember that when we add a password to the entire Excel file, the next time we open the file we will be asked to enter the password before being able to see any content in the workbook. Make sure you remember this password or you have it saved somewhere. To add a password to the entire file:
- Click on File
- Select on Info
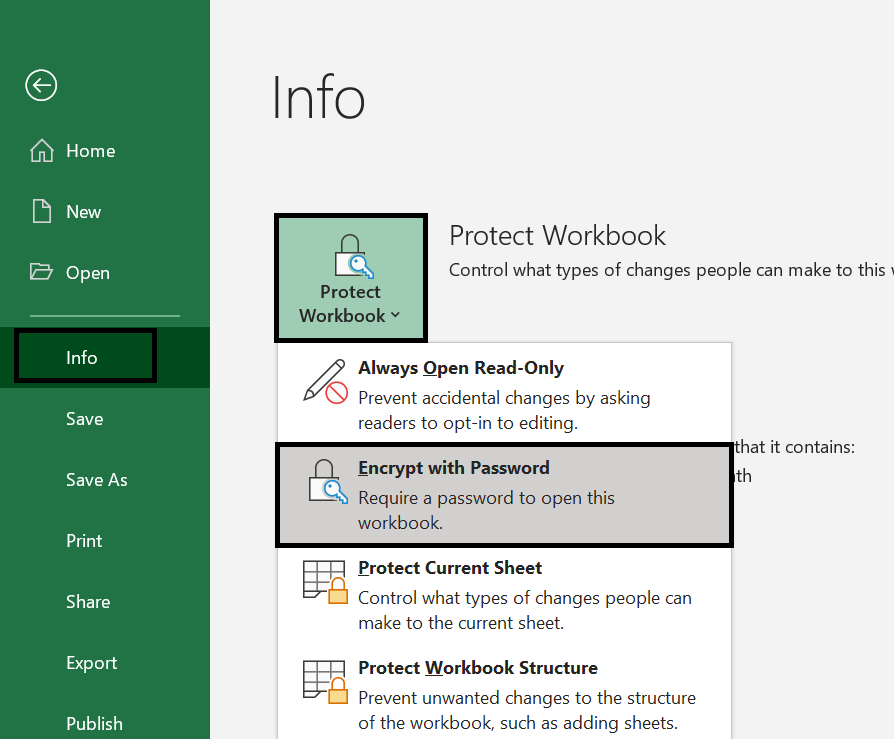
- Select Protect Workbook > Encrypt with Password:
- We will then be asked to enter the same password twice
The next time we want to open the file, we will be prompted to enter password before we can open the file:

How to Deactivate Encryption
We cannot deactivate the encryption until we open the file. This of course means we must enter the password first. Once the file is open:
- Go to File
- Click on Info
- Select Protect Workbook > Encrypt with Password:

- Clear the existing password in the field
- Click Ok.
| Note: And because this means anyone can remove a password once the workbook is open, if the Excel file is highly confidential, we recommend you to check the encryption every time you close a file to make sure it is still password protected. |
Protect Sheet in Excel
Protecting worksheet is another built-in feature in Excel. We can prevent people from making any changes to the entire worksheet or to specific cells in a worksheet. Others are essentially given read-only access. This may not necessarily be for security reasons but simply because there are many data and formulas in the worksheet we don’t want others to accidentally make changes to. For this reason you should consider whether it is necessary to add a password. After all adding a password only means we will now have another password we need to remember.
To protect our sheet:
- Go to the Review tab
- Click on Protect Sheet:

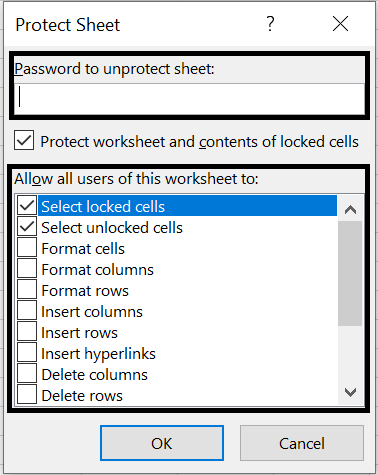
- We can now enter a password if we wish. However we can also leave it blank. Underneath the password, we can choose what we still want to allow users to do after worksheet is protected. By default the following will be selected. This means users will still be allowed to select cells (hence can copy content) even after worksheet is protected.
- Click OK
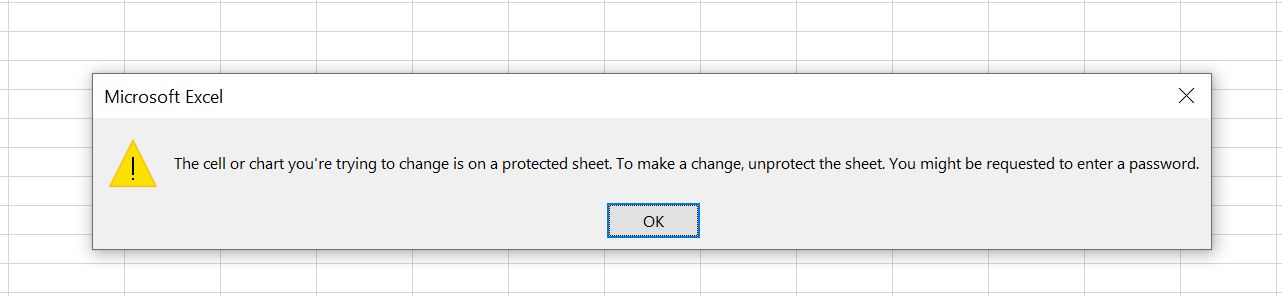
With the above settings, we can select cells in the worksheet. But if we double-click or try to enter any content, we will receive the follow message:
How to Unlock Specific Cells
We also have the option to only lock certain cells in a worksheet. This is particularly useful when we have formulas in the worksheet but we also require users to enter data.
Before protecting the sheet:
- Select the cells we want to allow users to edit
- Right-Click and select Format-Cells. Alternatively press Ctrl + 1
- In the Protection tab, deselect the Locked tickbox:

- Click OK
- Protect Sheet by clicking on Review tab at the top > Protect Sheet > Click OK
In the example below, we’ve “unlocked” the highlighted columns and hence we can enter data. However when we try to enter data into any other cell, we will receive an error message:

As we can see with the image above, almost everything at the top is greyed out. Even with the unlocked cells, we can only enter data. We cannot do any formatting (e.g. changing font, merging cells or insert rows/columns). Here’s something we can do to change that and it really all depends on how much access we want users to have:
When we click on Protect Sheet, we can have the following selected and deselected:

As we can see above, with these settings we are allowing users to select unlocked cells and format cells. And image below shows the results – users will have the option to format unlocked cells. Note that because the “Format cells” box is ticked, users can technically format any cells in the worksheet. However because the “Select locked cells” is not ticked, users cannot even select the locked cells hence they are not able to format/edit locked cells. Please also keep in mind because users cannot select locked cells, they will not be any to copy any content. As you can imagine, there are different variations available for us depending on our specific needs.

How to Unprotect Sheet
Unprotecting Sheet is simple:
- Go to Review tab
- Select Unprotect Sheet – if a password was added when worksheet was protected, we will need to enter password to unprotect the sheet.
Protect Workbook – Ability to Insert/Delete/Hide/Unhide Worksheets
Aside from encrypting the entire Excel file and protecting a particular worksheet, we can also “protect workbook”. And this means not allowing users to insert, delete, rename, hide, move/copy or unhide worksheets. Similar to protecting sheet, we have the option to add a password or to protect without a password.
- Go to Review tab
- Select Protect Workbook
- Click OK – with protecting workbook, we do not have many options on the settings. We can choose to enter a password but it is optional
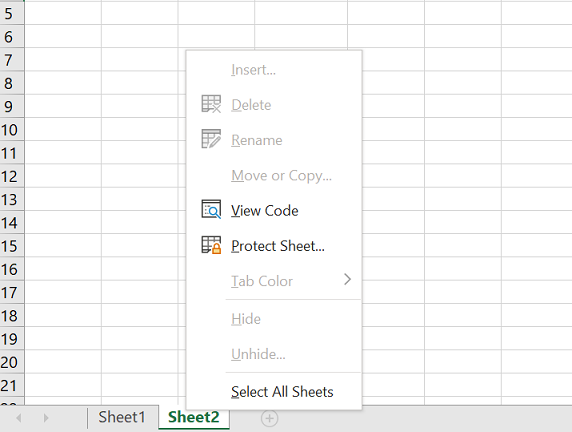
Once workbook structure is protected, usual functions we can do with a worksheet will be greyed out:
0 Comments Leave a comment